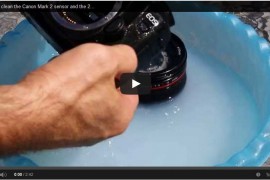
The question of “what is the Best way to clean a DSLR Sensor?” has been so unresponsively answered that it haunts the soul of every photographer once in a while. We the photography people are very much attached to our photography gear specially with our cameras and lenses. Infact most of us are overly obsessed when it comes to the maintenance and cleaning of our precious baby like gear. I recommend you to watch this video from lens rental and then read further to get some extra tips. I have also listed the various tools used in this tutorial and the sources where you can buy them cheap.
Tools Used in this Tutorial :
- Air blower – A very basic tool to blow puffs of air that carries away the dust. They are incredibly cheap and you can easily get a big one for less than $10 here.
- Sensor Loupe – Its a magnifying tool but is incredibly powerful and optically flawless. It is a necessity when it comes to inspecting the minuscule dust and dirt particles on the sensor. It is slightly expensive but worth every penny and you can get one for yourself here.
- Sensor Brush – As the name suggests its a brush but it is designed specifically to clean sensors and have a static charge generating mechanism to attract the dust particles. You simply can not get this job done without this tool. Scott and I prefer the one made by Arctic Butterfly. Buy one for yourself without a second thought here.
- Silicone Dust stamp – this one is also very handy tool and is required to remove any stubborn dirt that is not helped with the sensor brush. Also it can take care of the particles left behind by the use of a dirty brush by mistake. You can purchase this buddy here.
- Sensor Pen– Although its good to own one but this one is not necessary. You are only going to need one if you accidentally got oil or greasy dirt on your sensor with careless handling and cleaning. Good sensor pen are little bit costly but that is justified given the kind of job you are using it for. Also these are great substitutes for the not so recommended wet cleaning. Buy yourself one of this handy daddy here.
Alright so you got yourself all the necessary tools for the job and you have set your room clean like an operation theater to get the job done as per instructions passed in this tutorial. But before you proceed here are some
Extra Tips :
- Charge your battery before getting started with the cleaning process. We are going to hold the mirror up through out the whole procedure and you would certainly not like to see it snapping back because the battery drained out. Be very careful with this step.
- Do not get your hands into this job unless you are completely aware of what you are doing and what could go wrong. Getting it done from a professional will be much safer and also will cost you less than the price of the all those tools I mentioned above. However for a single purchase these tools are going to last you for a life time. Though you must keep in mind that what you are playing with is probably worth thousands of dollars. Just don’t make a silly mistake.
- Do not buy cheap and worthless tools. They might do more damage than good to your sensor which in most cases will be too expensive to fix. Don’t get lured with attractive marketing. Always but genuine and reliable products.
- However I would not advice this one but you can still go for the messy wet method that can get this whole cleaning thing done pretty quickly. You can buy some wet wipes for your sensor and get started. But take extreme care.
- While peeking into the sensor cavity make sure you are not sweating. As one drop of that salty sweat dripping off your nose would be more than adequate to get all those delicate electronics fired up. Do it inside a cool and dry place.
- Finally, be gentle while handling your gear. Over abusive cleaning is certainly going to ruin your camera sooner or later.


